
Canva has transformed how more than 170 million users across the globe approach design – most of them with no formal background in it.
According to Canva’s own usage statistics as of 2024, the platform sees over 15 billion designs created each year, making it one of the most widely used tools for visual content creation
So why is Canva so widely adopted?
At its core, Canva is a graphic design platform built for non-designers and professionals alike. Its biggest strength lies in its drag-and-drop interface that removes complexity from the design process. Whether you’re creating an Instagram post, a business presentation, or a poster, Canva strips away the friction with a highly intuitive layout.
Instead of starting from scratch, users can choose from over 600,000 templates, professionally designed and categorized by purpose – social media graphics, marketing collateral, event invitations, presentations, resumes, YouTube thumbnails, and more. Each template is fully customizable, allowing users to replace images, tweak text, adjust colors, and rearrange elements with just a few clicks.
It’s not just about ease. Canva blends accessibility with versatility, offering everything from simple photo edits to animated videos, all inside the same workspace. That makes it a go-to tool not only for solopreneurs, students, and marketers – but also for design teams and large organizations.
If you’ve ever struggled with bloated design software or felt overwhelmed trying to build visuals from a blank canvas, Canva offers a practical alternative. And whether you’re posting on TikTok, printing business cards, or sharing client proposals, the platform gives you a quick way to design, revise, and publish—all in one place.
Let’s now walk through how to set up your account so you can dive in.
Setting Up Your Canva Account
Signing Up and Choosing the Right Plan
Getting started with Canva is quick and frictionless. Head to canva.com, and you’ll be asked to sign up using your email address, Google account, or Facebook profile.
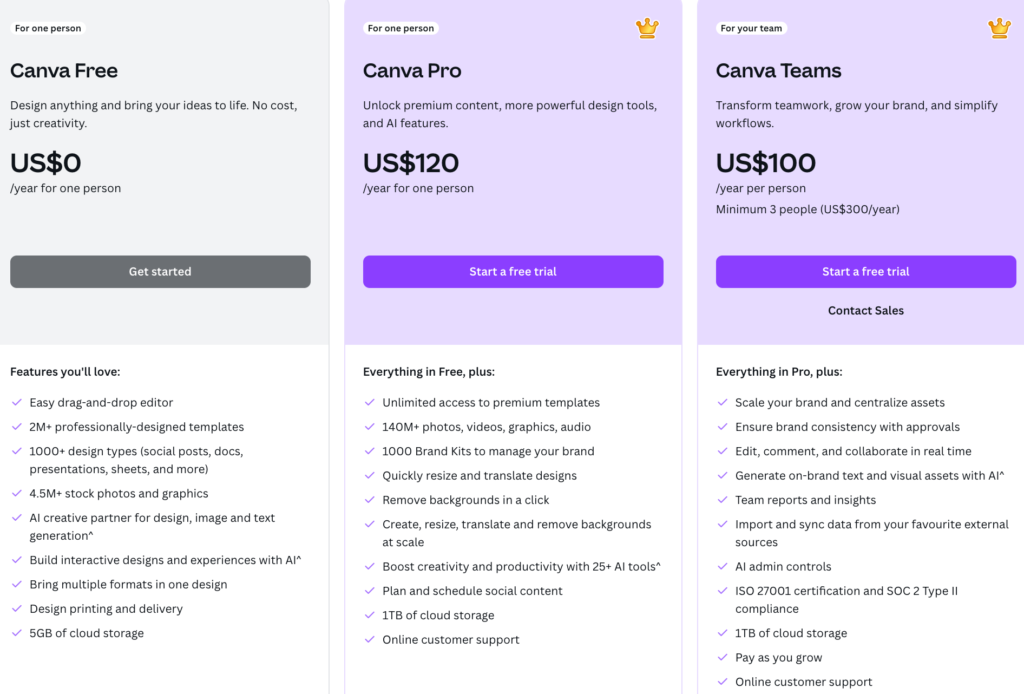
Once your account is created, you’ll be prompted to choose between the Free plan and Canva Pro.
Here’s how they differ:
| Feature | Canva Free | Canva Pro |
| Templates | 250,000+ | 600,000+ |
| Cloud Storage | 5GB | 1TB |
| Brand Kit | Limited | Full access |
| Background Remover | No | Yes |
| Content Scheduler | No | Yes |
| Access to Premium Elements | No | Yes |
If you’re just testing the waters, the Free plan gives you plenty to explore. But if you need branded templates, premium assets, or workflow tools like background remover and content planner, Canva Pro might be worth it – especially for marketing professionals or small businesses. Canva Pro also offers a 30-day free trial, so you can try everything without committing upfront.
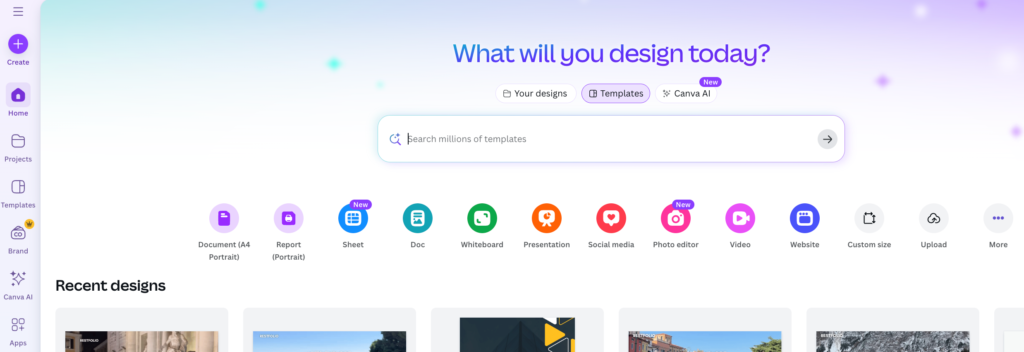
Navigating the Canva Dashboard
Once logged in, you’ll land on the Home Dashboard – your main control center.
Here’s what each section does:
- Home: A curated view of recent designs, recommended templates, and tools to start from scratch.
- Templates: Explore thousands of categorized templates, from social media and presentations to infographics and brochures.
- Projects: Houses your saved and shared designs. You can also create folders to organize your work by client, campaign, or content type.
- Brand Hub: Available to Pro users, this is where you upload brand logos, select fonts, and define your brand’s color palette.
- Apps and Integrations: Connect Canva to tools like Google Drive, Dropbox, and Slack for seamless importing and collaboration.
It’s all laid out with clarity – no design background required.
Understanding Canva’s Core Tools and Features
Whether you’re starting a personal project or handling creative tasks for a business, understanding Canva’s core tools is the first step toward building confidence. The interface is intentionally designed to remove complexity, keeping everything visual and intuitive – ideal for both beginners and those familiar with design tools.
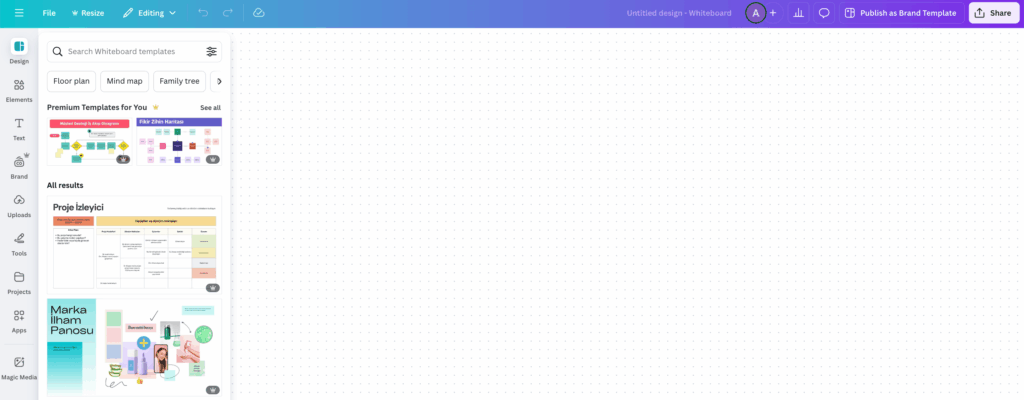
Exploring the Canva Editor
When you launch a new project, the Canva editor opens with a clear, structured layout:
- Canvas (center area): This is your working space where you create and arrange content.
- Left Side Panel: the toolbox for everything – Templates, Elements, Uploads, Text, Photos, Audio, and Videos. You’ll also find Projects, Apps, and Brand Hub here if you’re using pro.
- Top Toolbar: Lets you change font style, text color, position, spacing, layer order, transparency, and more – depending on what you’ve selected.
- Layers (via Position button): Manage what’s in front or behind. Group and ungroup elements to move or edit them together.
To add text, click Text on the left panel and choose a predefined heading or body style. Canva offers hundreds of fonts – both standard and decorative – along with tools to align, resize, and color your text quickly. To insert images or graphics, go to Elements or Photos, search for what you need, and drag it onto the canvas.
Want a colored background? Select the canvas, click the color box on the toolbar, and choose a new shade or gradient.
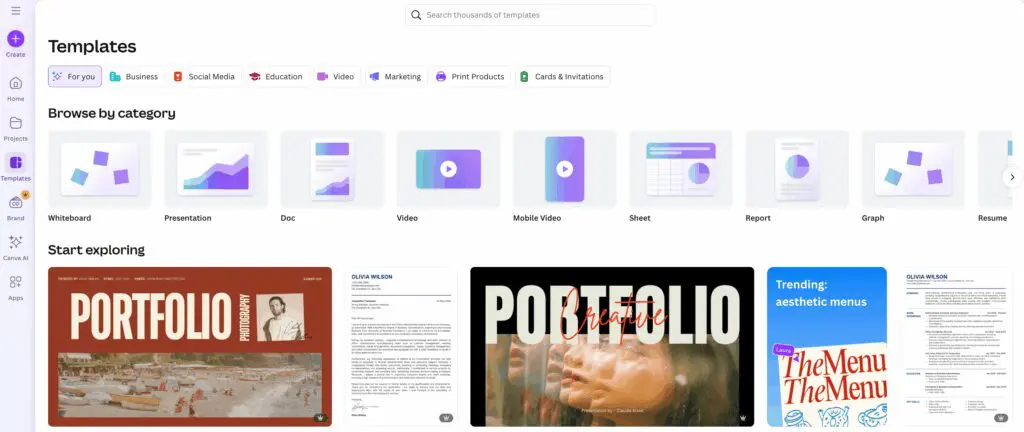
Working with Templates
One of Canva’s standout features is its massive template library, covering every design need imaginable.
To start with a template:
- Click Templates on the left side panel.
- Type in a keyword – like “Instagram Story” or “Sales Presentation.”
- Scroll through the categories and choose one that matches your intent.
Once selected, you can replace the content easily:
- Swap out text by clicking and typing.
- Replace images with drag-and-drop.
- Move or resize anything to match your needs.
Tips for picking the right template:
- Match the format to your content type (e.g., square for Instagram, 16:9 for slides).
- Pick a template with strong layout structure, not just aesthetic appeal.
- Avoid overly complex designs—they slow you down and distract from your message.
Choosing a Project Type
Before you create, choose the right canvas size and orientation. Click Create a design from the home screen or dashboard.
Popular project types:
- Social Media: Instagram posts (1080×1080), Stories (1080×1920), YouTube thumbnails.
- Print: Flyers, business cards, posters.
- Business: Presentations, reports, proposals.
- Marketing: Infographics, brochures, email headers.
You can also enter custom dimensions if you already know the exact size you need.
Adding and Editing Text
To add text:
- Click Text on the left panel.
- Choose a heading, subheading, or body text.
- Drag it onto the canvas and edit.
Best practices:
- Use no more than two font styles per design.
- Keep body text between 12–18pt for readability.
- Align text consistently across sections (left or center—don’t mix).
The top toolbar gives you full control to bold, italicize, change font size, line height, and letter spacing.
Inserting and Customizing Images and Elements
You can insert:
- Photos from Canva’s library (millions of free and Pro images).
- Shapes and Icons from the Elements tab.
- Uploads from your own device.
Click an element to move, resize, rotate, or crop. Right-click to change its order (send backward, bring to front), or use the Position tool on the top bar.
Using Advanced Canva Features (for Beginners)
Once you’ve mastered the basics, Canva’s advanced tools can take your projects to the next level without overwhelming you. These features might sound technical, but they’re intuitive and designed for users of all skill levels. Whether you’re refining a client presentation or collaborating on a social post, these next steps will help you get the most out of every design.
Working with Layers and Groups
Every Canva project is made up of elements – text boxes, images, icons – all stacked on top of each other. The stacking order matters. Items placed later sit above earlier ones, and this is where layers come in.
To manage layers:
- Click an element, then use the “Position” button on the top toolbar to move it forward or backward in the stack.
- Right-click any item to bring it to front or send to back, adjusting how elements visually overlap.
When designs get busy, grouping elements helps. Select multiple items (hold Shift while clicking), then hit Group in the top bar. Grouped items move and resize as one, but you can still Ungroup anytime to tweak each part individually.
Using layers and groups together helps keep your layout clean, precise, and easy to manage—especially in multi-element designs like flyers or social ads.
Adding Animations and Effects
Want to make your designs pop on screen? Canva has simple animation tools perfect for beginners.
Here’s what you can do:
- Select a page or element, then click Animate on the toolbar.
- Choose from basic motions like Fade, Rise, Pan, or Pop.
- For text, explore effects like Typewriter, Neon, or Shadow to give more personality.
Animations are ideal for social media posts, videos, or presentations. Just remember: subtlety usually works better than piling on too many movements.
You can also apply page transitions when building multi-page presentations or videos. Find this option above your design pages and select from options like Dissolve or Slide to smooth the flow between scenes.
Collaborating and Sharing Designs
Whether you’re working solo or with a team, Canva makes collaboration simple.
To share a design:
- Click Share in the top-right corner.
- You can invite people by email or copy a shareable link with specific permissions—View, Comment, or Edit.
For feedback, turn on Comments mode. Teammates can leave notes on exact elements. This is especially useful when reviewing content-heavy pieces like presentations or proposals.
Everything updates in real-time, so you’ll always see the latest version without switching between files or email threads.
Downloading, Exporting, and Publishing Designs
Creating a polished design is only half the job. Next, you’ll need to export or publish it properly—without sacrificing quality or compatibility.
Choosing the Right File Type (PNG, JPG, PDF, MP4, etc.)
Here’s a quick breakdown of the most common file types and when to use them:
| File Type | Best For | Notes |
| PNG | Web graphics with transparency | Higher quality than JPG, supports clear backgrounds |
| JPG | Photos, social media posts | Smaller file size, ideal for fast loading |
| PDF (Standard/Print) | Flyers, brochures, resumes | Print version is high-res, preserves layout |
| MP4 | Animated designs, video posts | Best for social videos, presentations |
| GIF | Short looping animations | Lighter than MP4 but lower quality |
Before downloading, use the Download button in the top bar, select the format, and adjust resolution or quality if needed.
Downloading vs. Sharing Online
Sometimes downloading isn’t the most efficient route—especially for content going straight to digital.
Canva offers direct publishing options:
- Post designs straight to social platforms like Instagram, Facebook, or LinkedIn.
- Share view-only links to let others see your work without making edits.
- Export to tools like Google Drive, Dropbox, or even WordPress, depending on your setup.
Whether you’re sending a pitch deck or scheduling a carousel post, Canva ensures you spend less time exporting and more time creating.
Time-Saving Tips and Best Practices for Beginners
Learning how to design in Canva gets easier once you know a few practical tricks. These time-saving features, combined with a smart workflow, can save hours on recurring design tasks. Whether you’re managing social media visuals or building presentations, keeping things tidy and efficient makes a real difference.
Using Shortcuts and Duplication Tools
Small optimizations go a long way—especially when repeated across projects.
Here are essential Canva keyboard shortcuts worth remembering:
| Action | Shortcut (Windows) | Shortcut (Mac) |
| Copy | Ctrl + C | Cmd + C |
| Paste | Ctrl + V | Cmd + V |
| Undo | Ctrl + Z | Cmd + Z |
| Group elements | Ctrl + G | Cmd + G |
| Duplicate element | Alt + Drag | Option + Drag |
| Move in small steps | Arrow keys | Arrow keys |
The duplicate function is especially helpful. Instead of recreating elements from scratch, hold Alt (or Option) while dragging to instantly copy shapes, text boxes, or images. It’s perfect for keeping spacing consistent and speeds up repetitive layouts like Instagram carousels or slide decks.
Use these shortcuts consistently, and you’ll move through designs far quicker than clicking through menus every time.
Organizing Projects with Folders
As your library of designs grows, staying organized prevents wasted time digging through past files.
To create and manage folders in Canva:
- Head to the Projects tab on the home screen.
- Click + Folder to create a new one.
- Name it based on a category—e.g., “Client Logos” or “Social Media Posts.”
- Move designs manually by dragging them into folders or using the right-click Move to Folder option.
Paid plans allow subfolders, which help break down large campaigns or client projects into smaller chunks. Even on the free plan, using folders cuts clutter and helps you find what you need when deadlines get tight.
Making the Most of Canva Pro Features
Canva Pro isn’t essential for beginners, but it does offer tools that become valuable as projects grow.
Here are a few standout features worth upgrading for:
- Background Remover: Instantly erases image backgrounds—no manual editing needed.
- Brand Kit: Saves brand colors, fonts, and logos to apply them automatically.
- Magic Resize: Quickly resizes a design to multiple formats (Instagram post, Story, LinkedIn banner, etc.) without rebuilding layouts.
- Premium Assets: Unlocks access to a larger image, element, and template library.
If you’re managing multiple brands or publishing content regularly, these features shave off hours from repetitive editing work.
For users on the free version, a smart workaround is creating a reusable template file that mimics a brand kit manually – save one base design and duplicate it every time you start a new project.
Common Mistakes Beginners Should Avoid
Even with Canva’s simplicity, a few mistakes can hold designs back from looking polished. Here’s what to watch for:
- Cluttered Layouts: Cramming too many elements into one frame makes content hard to read. Give each section breathing room.
- Inconsistent Fonts: Stick to one or two fonts per design. Mixing too many creates visual confusion.
- Ignoring Margins: Canva offers margin and ruler guides—use them. Elements too close to the edge feel rushed and unprofessional.
- Skipping Mobile Preview: Always check how a design looks on smaller screens, especially for social posts. What works on desktop might feel crowded on mobile.
Think of design as communication. Every element should support clarity, not compete for attention.
Final Checklist: Your Canva Success Blueprint
To wrap up, here’s a quick-reference checklist that beginners can follow for smoother workflows and cleaner designs:
Account Setup
- Signed up and logged in
- Selected the right plan (Free or Pro)
Canva Editor Basics
- Comfortable using the toolbar, layers, and side panel
- Familiar with dragging, resizing, and editing elements
Template Use
- Picked templates that match design goals
- Replaced text and visuals with project-specific content
Design Elements
- Text formatted for readability
- Images customized with filters or cropping
- Icons and shapes aligned with the brand
Brand Consistency
- Used saved fonts, colors, logos (or manually matched them)
- Kept style uniform across pages
Export and Publish
- Choose the correct file type (PNG, PDF, MP4, etc.)
- Shared or scheduled designs through the right channel
Time-Saving Practices
- Applied shortcuts and duplication
- Organized assets in folders
- Leveraged Canva Pro tools (if applicable)
Want to streamline your design process further? Explore BuzzCube’s unlimited graphic design service and let our creative team take it from here.